The PC must support TPM 2.0

I was able to disable the TPM check for a Windows 11 installation in VMware Fusion, but when trying to install some newer Windows Insider updates, I got an error when trying to install updates.

The error was:
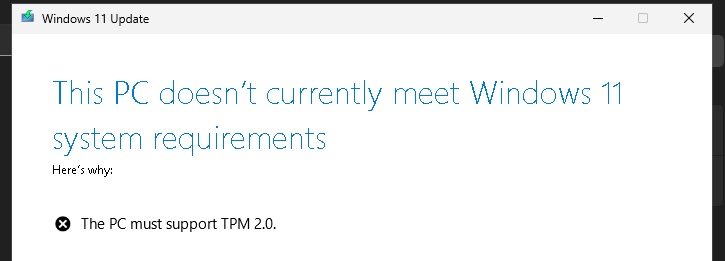
The PC doesn’t currently meet Windows 11 system requirements.

The PC must support TPM 2.0

The fix was surprisingly easy. I just had to encrypt the VM in VMware Fusion, then add a new device: Trusted Platform Module.

Powered back on and the update was able to proceed.

Unorganized guide to using AI for generative art.

I’ve started looking into various computer designed artwork and how they are created. It put me into a large internet rabbit hole of various resources so I’m using this page to record some of the good ones.

Simplified CC12M: https://colab.research.google.com/drive/1Tw_gOowjYuWMuX122rrXTd-RV3A8u_ZD

AI Animating:
https://www.youtube.com/redirect?event=video_description&redir_token=QUFFLUhqbnFLdXhwN21UX0RRUzFjcHh4QnJkZ0R1cWU2QXxBQ3Jtc0ttMXBYdDh4UXhYUGI3UjRjX2xpa0ZSbGM0RmE2dU80RE9HRTBSbklyTFItc1lEMEVNamxCdTlHMjFTTlpjdE5oWm9lQV9tRlo4a2t3dVl5bFJUUk4zUmtEUllyeUFfV3FfQkJWclVVWTJBVmFLZnpLZw&q=https%3A%2F%2Fcolab.research.google.com%2Fdrive%2F1_MckQnU0mCF8FJ7PoV21nhVvoOeotHGy%3Fusp%3Dsharing

CLIP guided Diffusion: https://youtu.be/QVUq7nTchco

Enhanced with Real-ESRGAN / VQGAN-CLIP

Pytti: https://www.youtube.com/watch?v=hM9xnar1e_4

This PC can’t run Windows 11 on ESXi 7

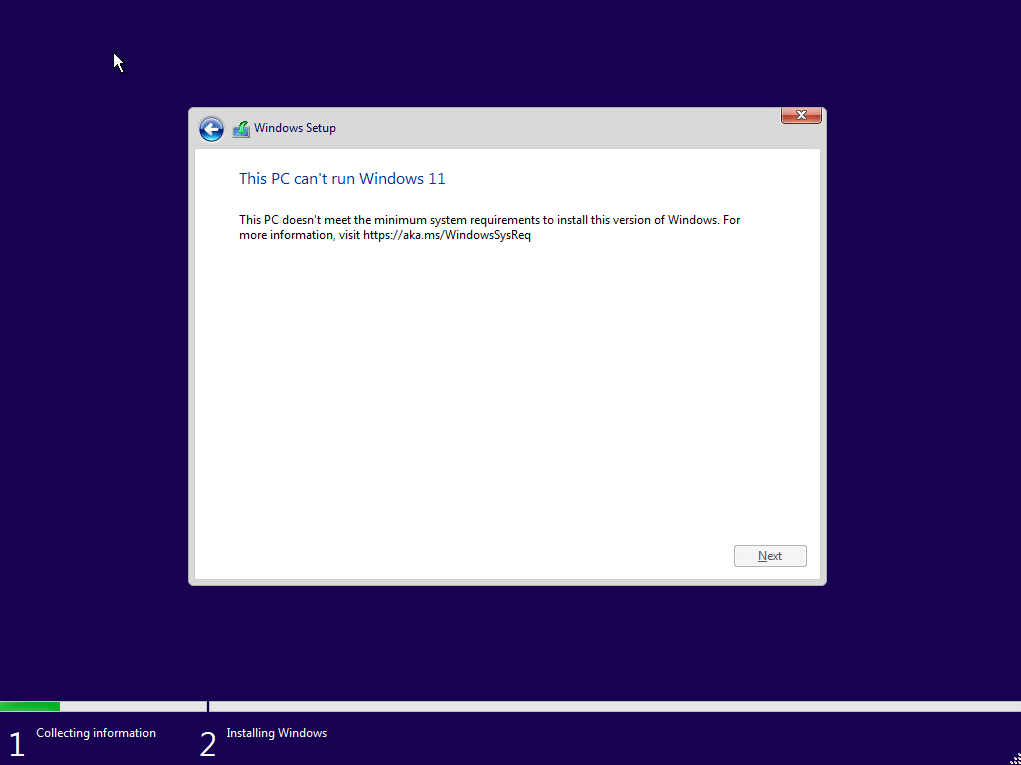
When trying to install the latest version of Windows 11 on my lab ESXi 7.0 host, I encountered the following message:

This PC can’t run Windows 11

I verified that I had met the minimum system/hardware requirements:
Windows 11 System Requirements
Proc: 1 Ghz
RAM: 4 GB
Storage: 64GB
System firmware: UEFI, Secure boot capable
TPM: version 2.0
Graphics card: directx compatible

What I soon realized was that my ESXi host did not have TPM 2.0…

Time to work around the issue…

When you get the error picture above simply press Shift + F10 and this will bring up a dos prompt. Type regedit and hit enter.

Navigate to HKEY_LOCAL_MACHINE\SYSTEM\Setup and create a new Key called: LabConfig

Create inside the LabConfig Key a ByPassTPMCheck DWORD (32-bit) with the value of 1

Click OK after editing the value data and then close out of all of the screens. Once you click on the red x in the corner of the setup screen, the setup will start again and ignore the TPM requirements.

Let me know if this helped you or didn’t work for you in the comments below.

vCenter failed to configure network

Well I thought this was fixed in the latest version (7.0U1c) according to the release notes but apparently it wasn’t. If you are like me you are simply trying to deploy the vCenter appliance with standard IPv4 network settings and the setting will not take.

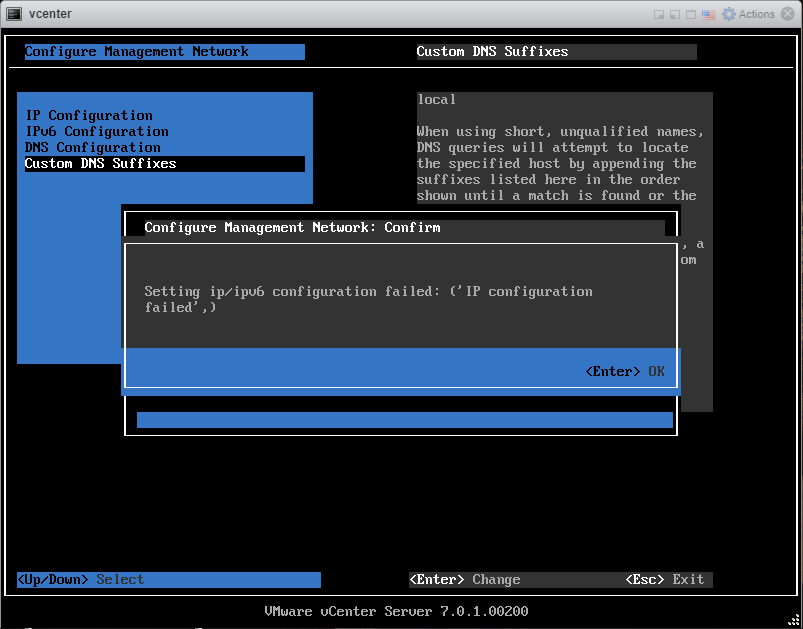
I’ve had various error messages like: ‘IP configuration not allowed‘ and ‘IP configuration failed‘ as well as: “This vCenter Server cannot be used or repaired because a failure was encountered. You need to deploy a new vCenter Server. Failure details”

This should be a relatively easy deployment but this bug definitely throws a wrench into the mix.

Luckily I’ve put some time into troubleshooting this so you don’t have to.

The best way I’ve found to work around this, is to simply just redeploy the appliance and to not fill out any of the networking configuration settings. (Make sure to set a password)

This will allow the appliance to inherit a DHCP address and allow you to complete the setup once deployed. You can also try to manually adjust the DHCP setting on the appliance.

You will first need to get to the shell. In the browser console of the vCenter VCSA press Alt + F1

Then login with root credentials and type: shell

then run /opt/vmware/share/vami/vami_config_net

this will allow you to temporarily set DHCP for your appliance to gain access to the setup.

You can reboot the appliance and you should now have an IPv4 address to continue the setup with. Let me know if this helps you or if you found an easier way to fix in the comments below.

Shortcut to change Alienware Monitor Input

Whether I’m gaming or sending out business emails, my alienware monitor has always been right in front of me. It has great performance for gaming and amazing color range for editing videos or photos. Long story short, there are many things I love about the monitor… but switching inputs is definitely one of the things that can be improved. Let’s explore two ways to make changing the inputs quicker and easier.

Solution 1:

Depending on your model (mine is the aw2518h) you may have the option to set “Shorcut Keys” under the Personalize option using you monitor buttons.

Alienware 25 Monitor

This will be the easiest way to quickly switch from either input directly from the monitor.

Solution 2:

This solution requires some additional software to be installed but will make for an easy switch using a simple command.

Let’s first start with downloading the Dell Display Manager Application:
https://www.dell.com/support/home/en-us/drivers/driversdetails?driverid=cx7tc

Make sure your display is supported, there is a list of compatible systems at the bottom of that link.

Please change appliance (OS) root password before attempting an update

I’ve been working today to get my home lab updated and came across a vcenter update message while running the Pre-Update.

It appears that I need to change the root password for the OS as it expired.

A quick google search and I found a VMware KB article on how to update the password.

  1. Connect to the vCenter Server Appliance with an SSH session and the root user credentials.
  2. Use the following commands to get to the command prompt:
shell shell.set --enable true
shell

3.Change the root password using passwd command.
4.Verify the root account password has been changed using:chage -l root       
5.Re-attempt the upgrade again.

Thats it! Run the pre-check again and update!

***referenced KB article: https://kb.vmware.com/s/article/67414 ***

AWS Outposts vs Google Anthos vs Azure Stack

While there is no one strategy to rule them all, hybrid cloud seems to be the enterprise strategy of choice. This strategy involves operating different workloads across different infrastructure environments including private cloud, public cloud, and at the edge.

While public cloud has been in the spot light in recent years we have seen a renewed focus on private cloud with the ability to burst or move data and workloads anywhere. In comes Azure Stack, Google Anthos, and AWS Outposts.

Rob Steele Wallpaper

Been working hard on my branding and figured I should put up some wallpapers. So I had some fun with photoshop this morning and made a couple. I tried to get logo front and center with some style. Will use these for instructional videos in the background on my desktop. Enjoy !

Rob Steele Wallpaper 1920 x 1080

Amazon Freetime Unlimited Review for 2018

It’s been a while since I’ve taken a real hard look at the content and apps my kids have been consuming. We always keep an eye out for anything crazy, but I also like to get them interested in content I know is good for them and obviously safe from things they shouldn’t be seeing. I recently took a second look at getting them signed up for the Amazon FreeTime Unlimited so they can consume on their iPads.

Much to my dismay, the service is only available on fire tablets, fire tv and android devices. It’s been becoming a bit of a hassle trying to get the kids a single platform that they can use for most activities. It seems like there is always some politics involved with what service is available on what. From a parents point of view, I wish everyone just got along.

However the good news is, I recently got my kids into Osmo and they have loved it. My secret parent goal is to trick them into liking programming. Math, Puzzles, and some creativeness keeps them engaged pretty well. Osmo isn’t the entire good news, since it runs on the iPad though. The good news is I’m secretly graduating them to start working on Raspberry Pis.

There are a couple cool coding for kids books for the Pi I’d like to get them involved with (like this one) and since they will each have their own Raspberry Pi I can also load android OS onto it so that they can consume Amazon FreeTime. This might be something I need to figure out how to dual boot though… or hopefully they can figure it out.

Sorry about my rant, but ultimately this post was to reach out to other parents to see how the service is and if its worth the hassle of setting up other devices. I will still go and set it up myself just so I can take a look and will give a solid review around Amazon FreeTime. I’ll give two sides to the review, the parent features and the things the kids like about it. Let me know below in the comments if you are using it and what you like or dislike about it.